How to automate your sales pipeline with HubSpot Deals?
Automating your sales pipeline involves automatic creation of deals and changing of deal stages in HubSpot whenever an order status is changed in your WooCommerce store.
You can automate your sales pipeline using our HubSpot WooCommerce integration in three different steps:
Mapping Deal Stages With eCommerce pipeline
Mapping your deal stages ensures that your WooCommerce order statuses sync with the right HubSpot deal stage.
- You get an option to map your pipeline while setting up the plugin.
- If you’ve completed the setup, open the plugin, click Deals and then View button in the Map Deal Stages with eCommerce pipeline section.
- You’ll see all the WooCommerce statuses with the deal stages in front of them.
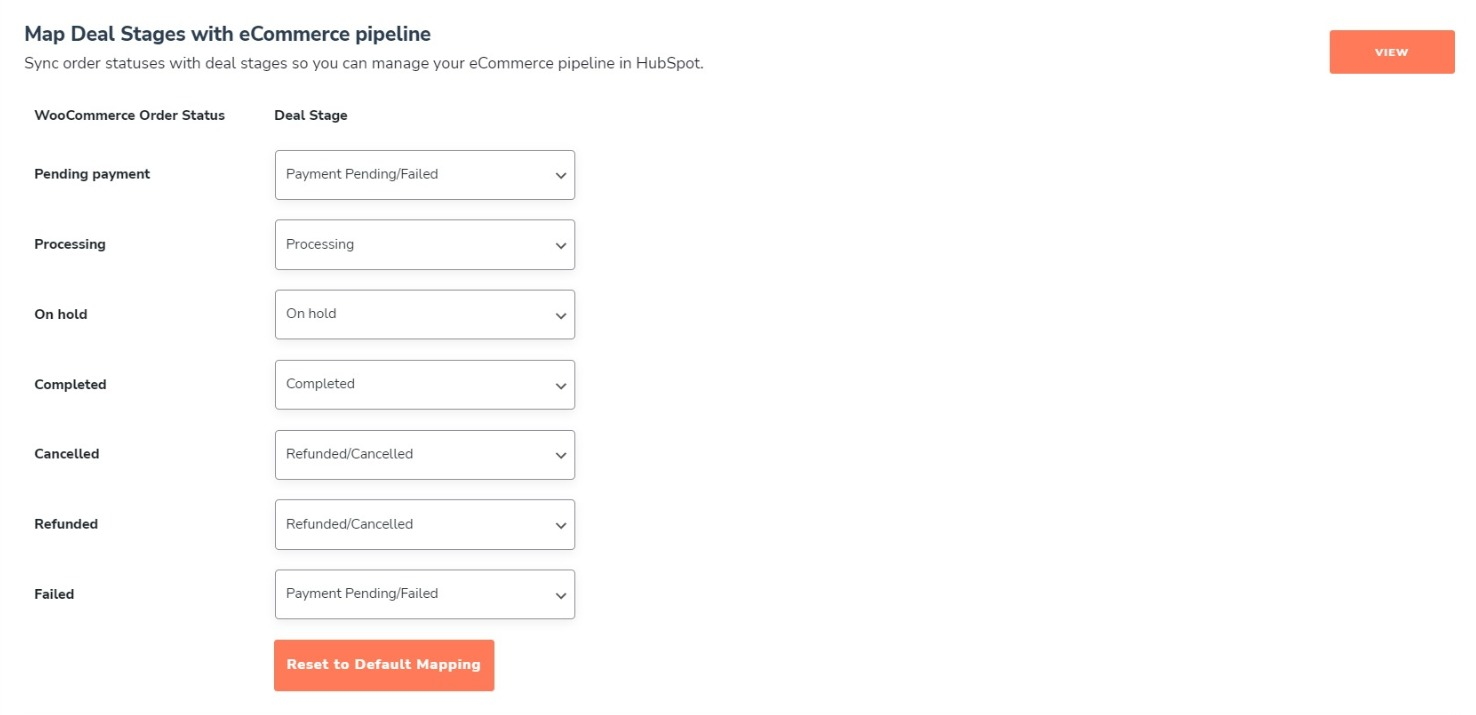
- Map all the stages according to your business needs.
Automate Deal Creation on New Orders
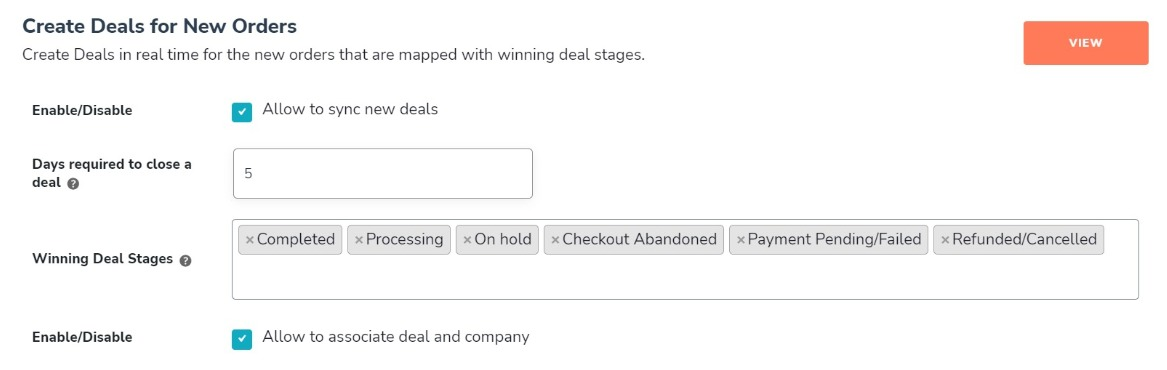
Automating deal creation makes sure that whenever a new order is placed on your WooCommerce store, a deal will automatically be created on HubSpot for that order.
- Open the HubSpot WooCommerce integration plugin and navigate to the Deals tab from the menu bar.
- Click on the View button in the Create Deals for New Orders section.
- Enable the Allow to sync new deals checkbox(by default it is enabled).
- Also enable the Allow to associate deal and company checkbox.
Now, whenever a new order is placed on your WooCommerce store, a deal will automatically be created in your HubSpot sales pipeline.
Syncing Deals Data to HubSpot
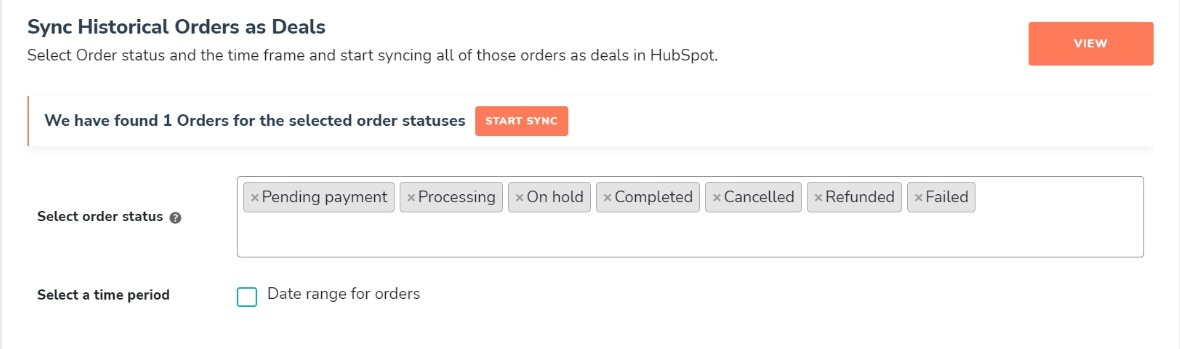
You can sync all your existing or historical WooCommerce orders as deals over HubSpot CRM.
- Open the HubSpot WooCommerce integration plugin.
- Click on the Deals tab in the menu bar.
- You’ll see a section named Sync Historical Orders as Deals. Click on the View button in front of it.
- Select the order statuses you want to sync the orders of. For example, if you want to sync only the orders with Pending status, select them (by default all statuses are selected).
- Now if you like, you can select the date range as well to sync the orders.
- Once done, if you have any unsynced orders, a Sync Now button will appear. Click on it and your orders will start syncing.
