How one should Use Progressive Fields in HubSpot Forms to Capture Leads?
The two hidden secrets of HubSpot forms that make them smarter and more efficient are the HubSpot form fields types. HubSpot forms include various types of fields that make it easier to design multistep forms in HubSpot. The HubSpot form fields types include –
- HubSpot Form Progressive Fields
- HubSpot Form Dependent Fields
Progressive fields or progressive profiling fields empower your basic HubSpot forms with standard fields to extend another field appearing in the place of the standard field.
1. How do Progressive Fields Work in HubSpot Forms?
Suppose you have created a basic HubSpot form with standard fields to capture basic information about the prospecting leads. The same fields will appear every time this form is reloaded. You can use the progressive field here to set another field to appear in the place of the existing field; if your contact already has the value for a specific field and is filling out the form again.
Progressive fields are helpful in gaining new information from your contacts without irritating them by asking for similar information again and again; gradually building their trust. The limitation of the progressive field is that it cannot be used in pop-up forms.
Important!
- If the Always create contacts for new email address option is turned on, you cannot use progressive fields.
- If the Pre-populate fields with the known values option are turned on and the property value is known, the HubSpot queued progressive fields will appear for progressive form fields in HubSpot. Pre-populated fields will only appear for non-progressive form fields.
2. How to Add Progressive Fields in HubSpot Forms
To add the progressive fields in forms in HubSpot, follow the steps mentioned below:
Pre-requisite: Please ensure before proceeding with adding the HubSpot progressive form fields that the contact must currently not have a value for the field and must not have had a value for the field in the past. Also, you must choose which fields to queue up, then select the existing fields to make them progressive.
-
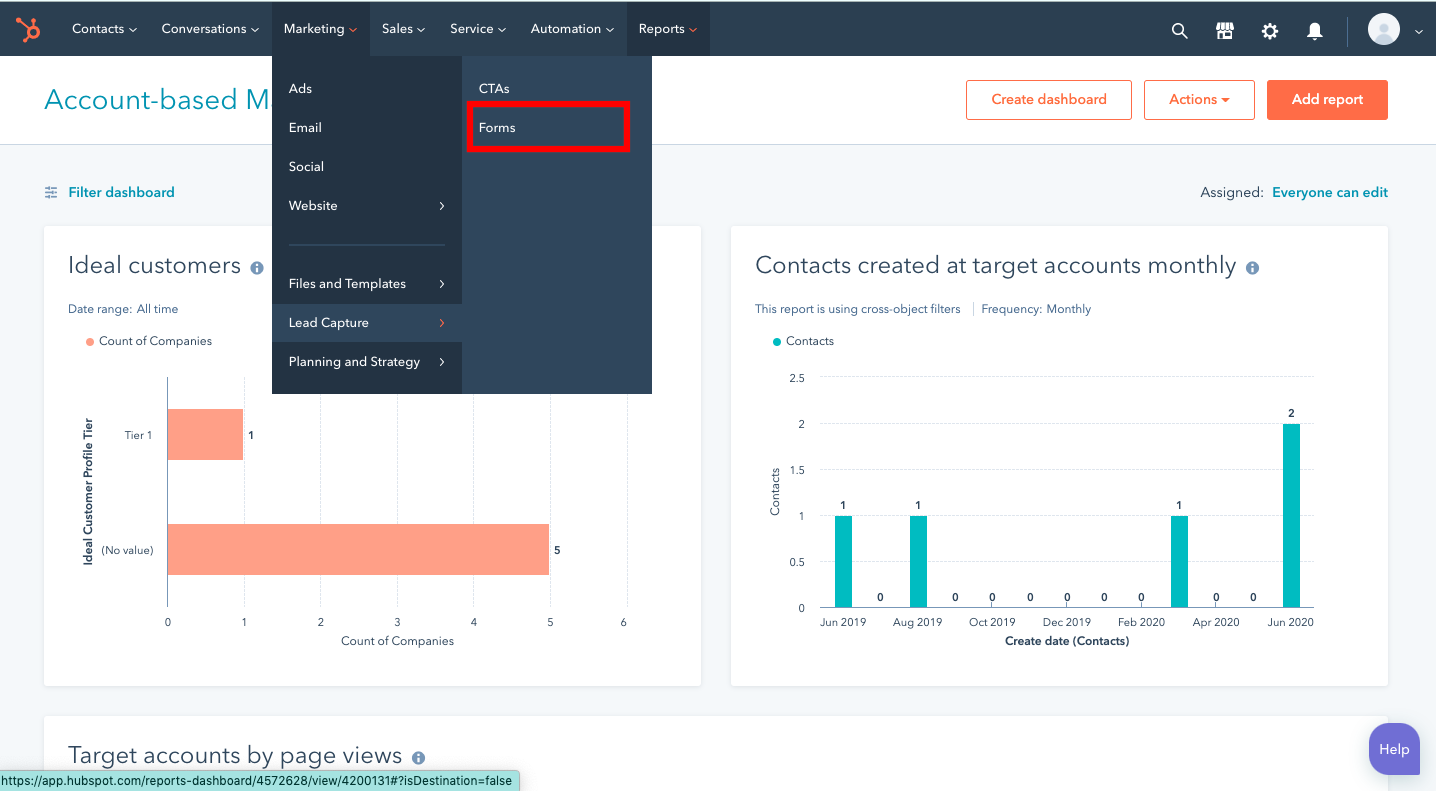
- Login to your HubSpot account. Go to Marketing > Lead Capture > Forms.
-
-
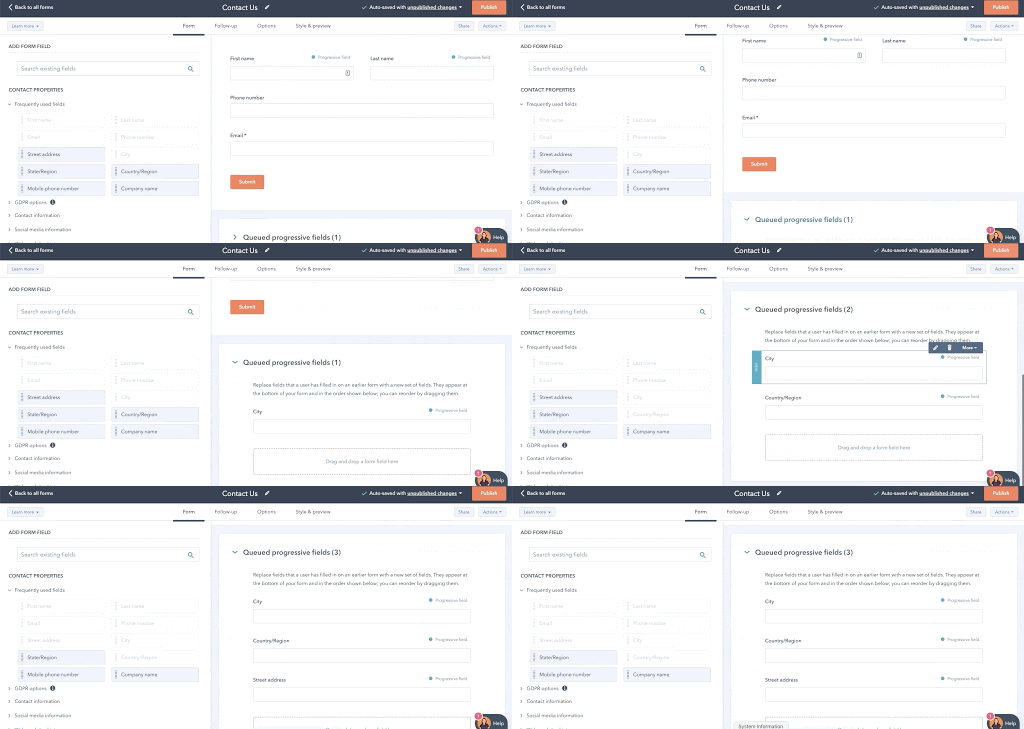
- Click the name of a form or create a new form.
-
-
-
-
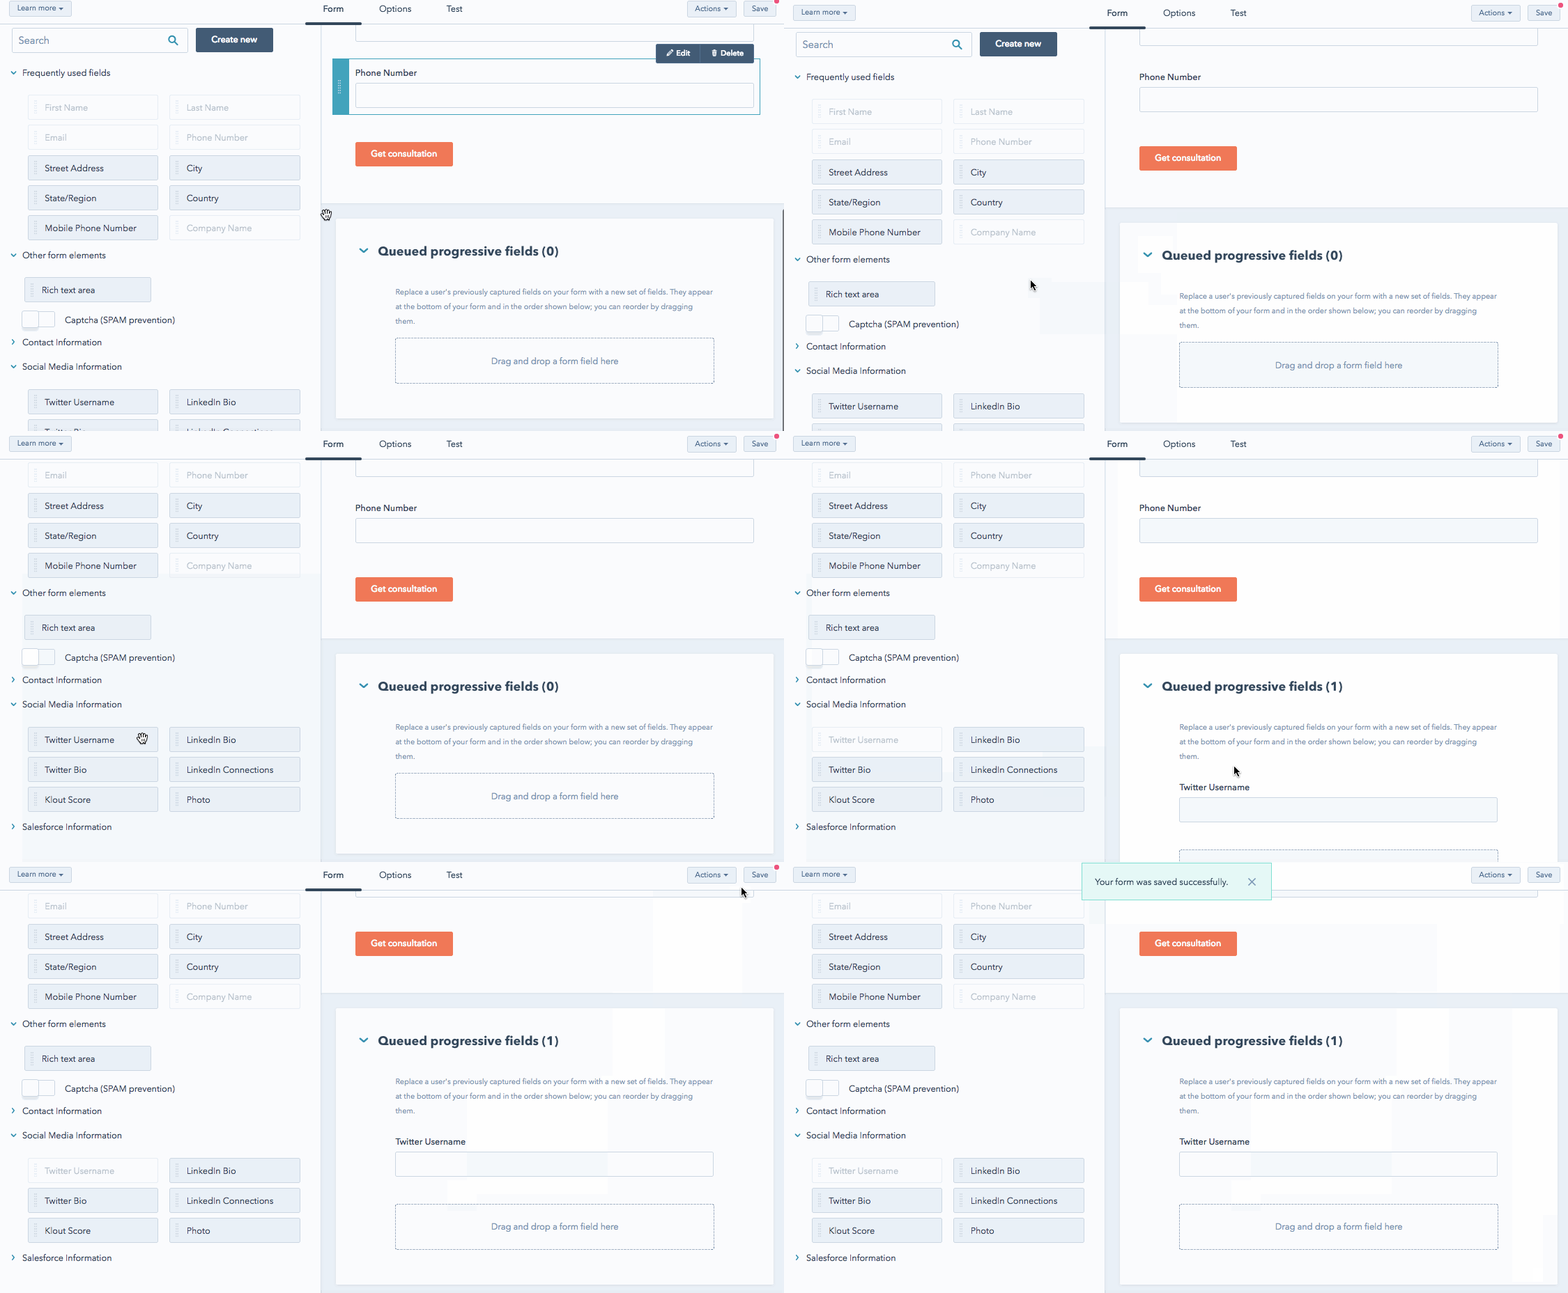
- After selecting the form, go to the form editor. Scroll down to the Queued progressive fields section, select and drag over the field(s) that you want to display as progressive for the contact’s previously captured information. The queued fields will appear in this order if a contact has known values for any of your progressive form fields in HubSpot.
-
-
2.1. How to Edit and Add Criteria to Progressive Field?
-
-
-
-
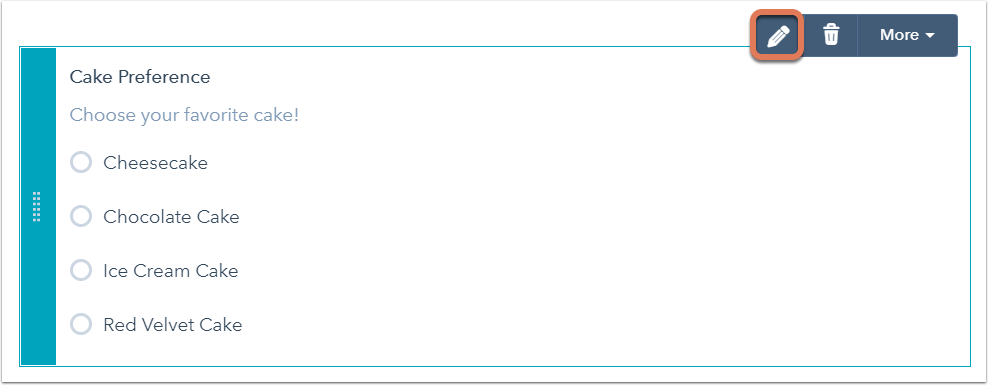
- To make a field progressive, hover over the field and click the pencil icon.
-
-
-
-
-
-
-
-
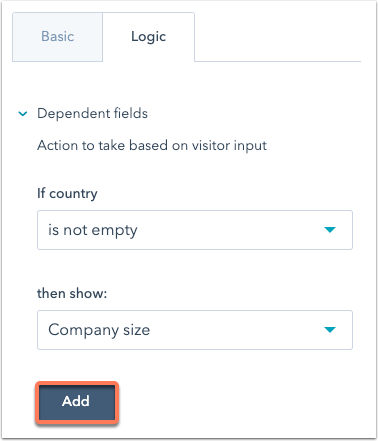
- Click the Logic tab in the left panel.
- Next, in the Dependent fields section, select the criteria from the drop-down menu that you like to use in your progressive field, then select the form field to show if the above criteria are met.
- Once done adding criteria, click Add.
-
-
-
-
3. How to Test Progressive Fields are Added Correctly to Your HubSpot Forms?
To test whether the progressive fields are added to the HubSpot forms or not, follow the steps directed below:
-
-
-
-
-
-
-
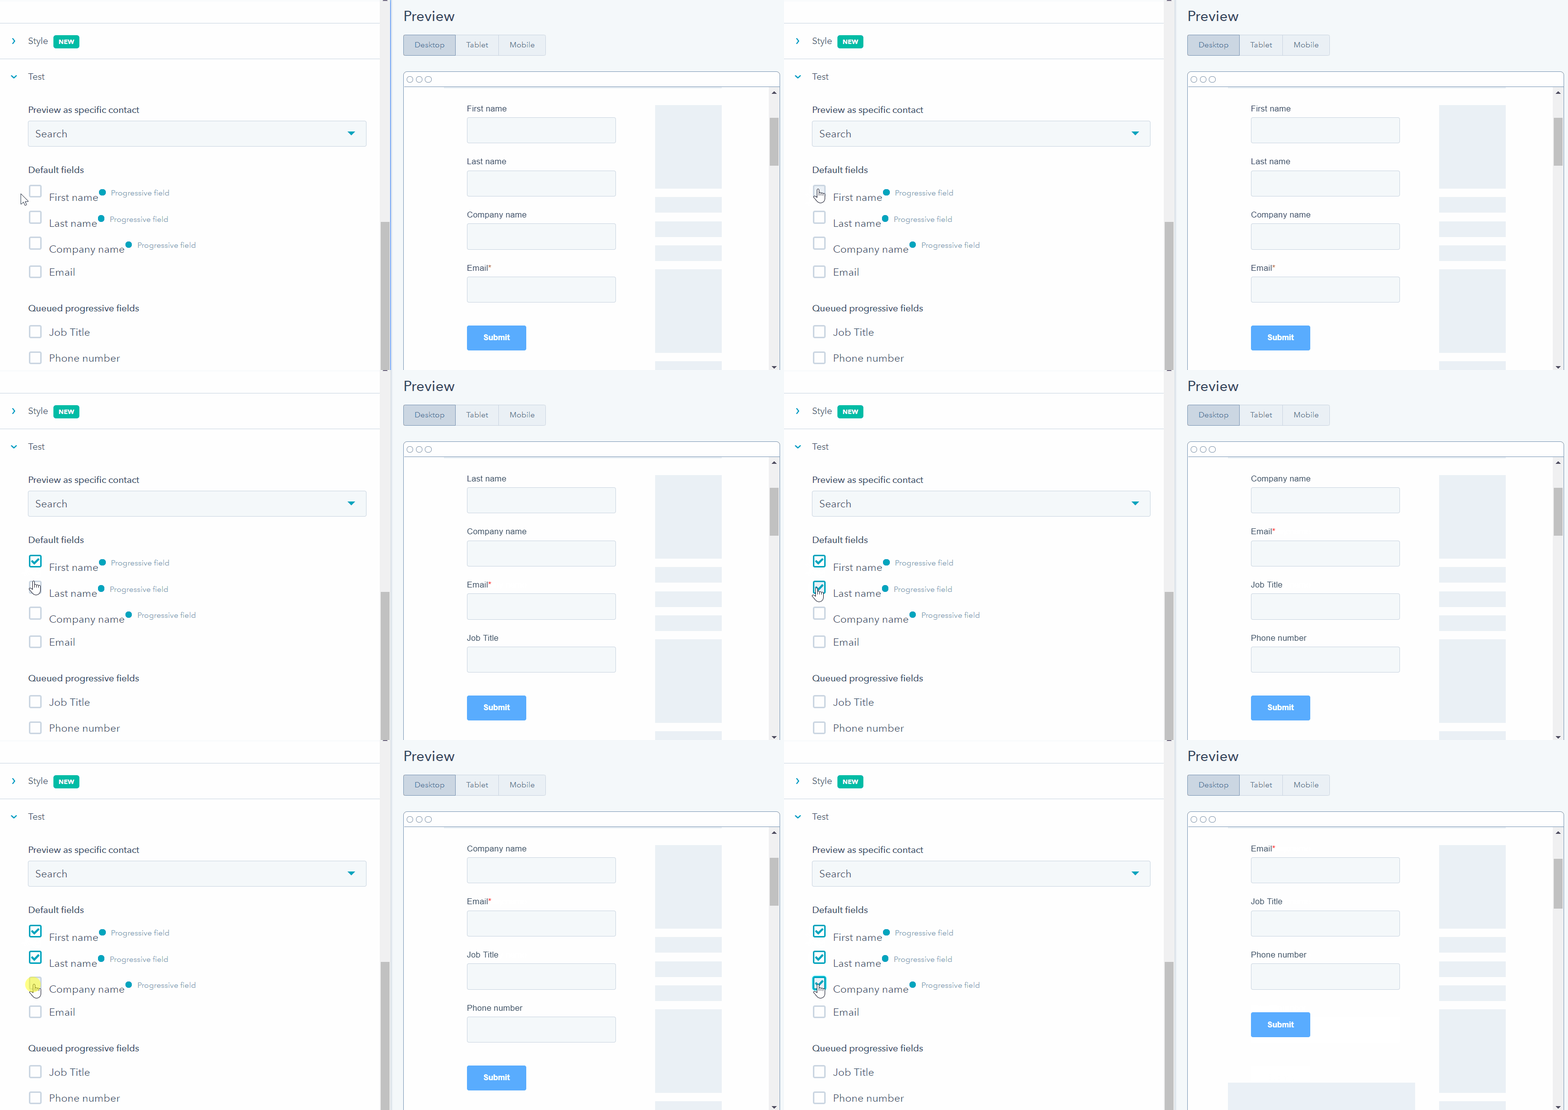
- Go to the Style & Preview tab.
- In the left panel, click the Test section to expand the window.
- Select a Queued progressive field checkbox and see how the form changes for a visitor who has already filled it in or already has a value for the form field.
-
-
-
-
-
-
-
-
-
-
- Once done, Save or Publish your changes by clicking on the button in the upper-right corner.
-
-
-

